This demo script shows how the side screen can be used. The dimensions of the side screen are slightly different to the bottom screen, so images that are used with the side screen need to be adapted.
Set up
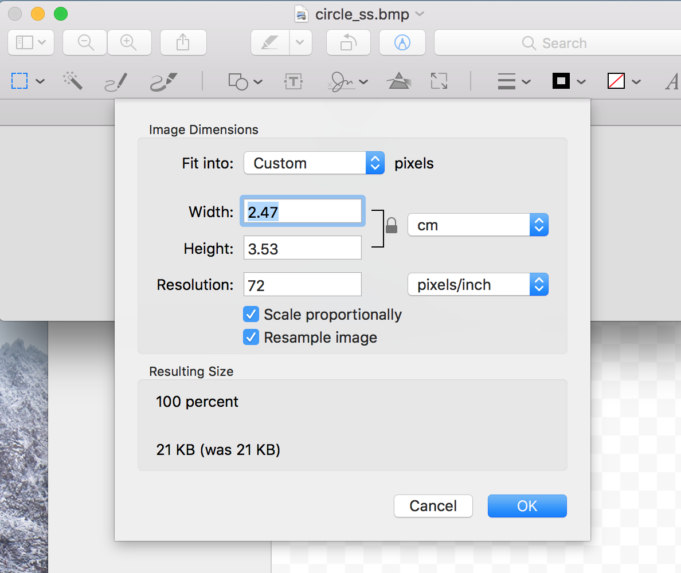
The side screen has different dimensions to the bottom screen, so images that are on the side screen will appear elongated (as the pixels are not square, but instead 1 x 0.7). Consequently you need to resize any images / bitmaps that you use so that the horizontal dimension is 0.7 of the original bitmap. For example if you create a circle and want to use this on the side screen, and the height is 10 the width will be 7, or, as in the image below. Don’t forget to save this resized bitmap in the unit’s Asset directory before running experiments.
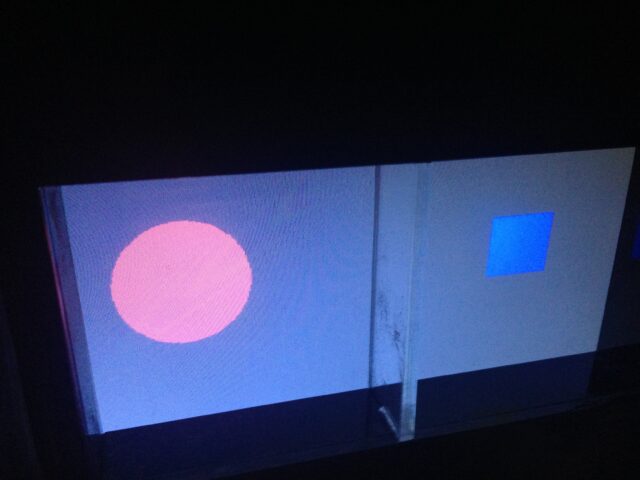
For the scripts below we created a circle for the side screen (as shown below) and a square in the same way. Note that the circle appears elongated vertically after it is resized to accommodate for the rectangular pixels
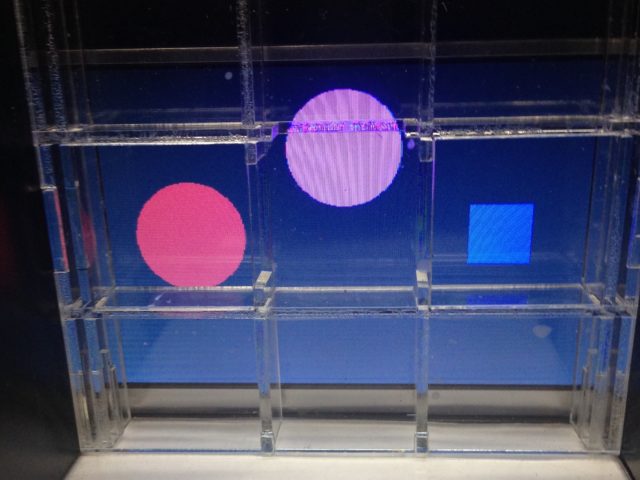
Please note, when running a service that uses the side screen, the 'live video’ screen amalgamates the image as shown on the side screen with the overhead video tracking of the tank. If you would like the live video screen not to include the images presented on the side screen, select ‘Show advanced controls’ and then ‘Lighting’. To turn the images back on you select ‘Lighting’ again.
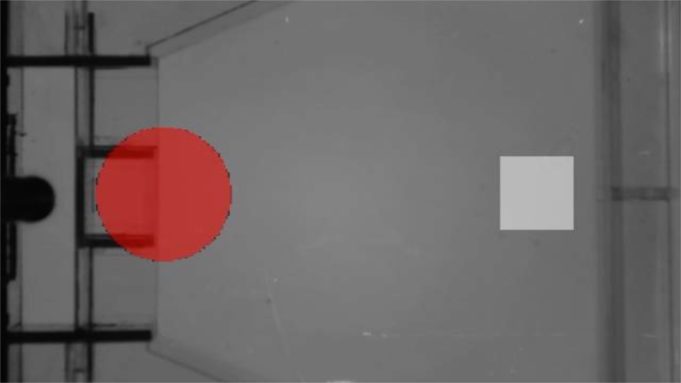
The side screen image will not show on any picture that is taken in the unit during the service, however the side screen images will show on any video footage that is taken.
The image (3) below is a still taken from a video made whilst running this service and enables you to see the straight-down view of the tank (which includes the food hopper insert on the left and the 2-choice insert on the right), as well as the images as displayed on the side screen.
The video and 'live video' screen show some slight black marks around the circle, however these marks are not evident on images presented on the side screen.
Script explanation
There are two scripts below, demonstrating how two different kinds of insert can be used with the side screen and its tank.
Script 1:
The first script, side_screen_2choice_zfish.zs, will display two images simultaneously, one in each of the chambers created by the 2-choice insert. This script could be adapted so that the two areas are detection zones and 'nose pokes' could automate subsequent stimuli (such as solid food delivery).
DEFINE NUM_BIN 10
DEFINE WAIT_TIME 2

SETLIGHT(LIGHT1,SPRITE,475,500,698)
SETLIGHT(LIGHT2,SPRITE,1125,500,698)

LOAD(SPRITE_IMAGE,"1:circle_ss")
LOAD(SPRITE_IMAGE,"2:square_ss")
The first two DEFINE commands for sprites must be written when your script includes the use of images on the screen.
The following two commands DEFINE values used in the script, in this case number of trials and amount of time in seconds.
The two SETLIGHT commands specify where the images should be placed on the screen and their size e.g. LIGHT1 is set at coordinates 475,500 is 698 pixels in size.
The two LOAD commands detail which images to use for LIGHT1 (circle_ss.bmp) and LIGHT2 (square_ss.bmp). The .bmp files must be saved in the unit's Assets directory.
ACTION MAIN

 LIGHTS(ALL,OFF)
 INVOKE(SCREEN,NUM_BIN)
 LIGHTS(ALL,OFF)

COMPLETE
The next set of ACTION MAIN commands (above) details the order of the whole experiment. In this case, at the beginning and end all the lights are turned off.
The Action SCREEN is run the number of times as defined by NUM_BIN in the first set of commands in the script.
ACTION SCREEN
 LIGHTS(LIGHT16,ON)

 LIGHTS(LIGHT1,WHITE)
 LIGHTS(LIGHT2,WHITE)
 WAIT(WAIT_TIME)

 LIGHTS(LIGHT1,RED)
 LIGHTS(LIGHT2,WHITE)
 WAIT(WAIT_TIME)

 LIGHTS(LIGHT1,RED)
 LIGHTS(LIGHT2,BLUE)
 WAIT(WAIT_TIME)

 LIGHTS(LIGHT1,GREEN)
 LIGHTS(LIGHT2,GREEN)
 WAIT(WAIT_TIME)

 LIGHTS(ALL,OFF)
 WAIT(WAIT_TIME)

COMPLETE
The SCREEN section above details the actions for this period:
The overhead lights (LIGHT16) are turned on. The default colour for these lights is white.
The two images display in the locations specified in the SETLIGHT commands detailed above, both in the colour white.
After a WAIT_TIME defined at the top of the script, the two images display again in different colours (i.e. the circle will be red and the square will be white).
The images display for a period two more times, in different colours.
All the lights will turn off before the action is section is COMPLETE.
Script 2:
The script, side_screen_2choice_feeder_zfish.zs, is a demo for the feeder and 2-choice insert which is used when this insert is slotted into the front of the tank, so is placed underneath the feeder. The side screen will be placed at the front of the tank for this experiment. In the script there is an image (LIGHT3) displayed where food is delivered by the feeder.
DEFINE NUM_BIN 10
DEFINE WAIT_TIME 2

SETLIGHT(LIGHT1,SPRITE,372,500,465)
SETLIGHT(LIGHT2,SPRITE,1228,500,465)
SETLIGHT(LIGHT3,SPRITE,800,233,465)

LOAD(SPRITE_IMAGE,"1:circle_ss")
LOAD(SPRITE_IMAGE,"2:square_ss")
LOAD(SPRITE_IMAGE,"3:circle_ss")
The three SETLIGHT commands detail the position and size of each of the sprite images loaded (i.e. LIGHT1 will have its centre located in the position 372,500 and will be 465 pixels in size).
The three LOAD commands tell the unit which bitmap image should be used for which lights, i.e. both LIGHT1 and LIGHT3 will be the asset "circle_ss.bmp".
ACTION MAIN

 INVOKE(SCREEN,NUM_BIN)

COMPLETE
The Action SCREEN is run the number of times as DEFINED in the first set of commands in the script
ACTION SCREEN

 LIGHTS(LIGHT1,WHITE)
 LIGHTS(LIGHT2,WHITE)
 LIGHTS(LIGHT3,WHITE)
 WAIT(WAIT_TIME)

 LIGHTS(LIGHT1,RED)
 LIGHTS(LIGHT2,WHITE)
 LIGHTS(LIGHT3,WHITE)
 WAIT(WAIT_TIME)

 LIGHTS(LIGHT1,RED)
 LIGHTS(LIGHT2,BLUE)
 LIGHTS(LIGHT3,MAGENTA)
 WAIT(WAIT_TIME)

 LIGHTS(LIGHT1,GREEN)
 LIGHTS(LIGHT2,GREEN)
 LIGHTS(LIGHT3,YELLOW)
 WAIT(WAIT_TIME)

 LIGHTS(ALL,OFF)
 WAIT(WAIT_TIME)

COMPLETE
The SCREEN section above details the actions for this period:
The three images display in the locations specified in the SETLIGHT commands detailed above, all three in the colour white as specified in these commands.
After a WAIT_TIME the three images will display again in their locations in different colours (i.e. the circles will be red and white, the square will be white).
The three images display two more times, in different colours.
All the lights turn off before the actions is COMPLETE.
Script download
To download the side_screen_2choice_zfish or side_screen_2choice_feeder_zfish demo scripts as .zs files (file type Zantiks software reads), choose the Save File As option in the right-click dialogue box. Clicking on the script name hyperlink will open a read-only version of the script.
Script downloads:
side_screen_2choice_zfish.zs
side_screen_2choice_feeder_zfish.zs
Assets
You will need to upload the asset into the Asset directory on your Zantiks Control Console and ensure the correct asset name is in the LOAD(ZONES,"name_of_asset") command in the script.
See the Calibrating your Zantiks unit page and Asset building in the AD unit page or Asset building in the LT unit page for details on how to create assets customised to your system.
Sprite asset downloads:
circle_ss.bmp
square_ss.bmp

